Jane from Handmade Jane is having a New Years giveaway! There's a lovely sewing book and some beautiful Liberty fabric up for grabs! Here's the post! Goodluck! :)
Jellybean x
Friday 31 December 2010
New book!
Fit for Real People is only £11.75 at Amazon until the end of January! I've been meaning to pick this up for ages as I'd seen so many bloggers swear by it. The money off and an Amazon gift voucher for Christmas finally gave me the shove to grab it :) I can't wait to have a look through, I've already seen the FBA instructions, and loved how well explained and illustrated it was.
Happy New Year!
Jellybean x
Happy New Year!
Jellybean x
Happy New Year!
I hope you all had a wonderful Christmas! I went home for Christmas, and it was lovely to see everybody :)
Also its New Years Eve! This year has gone crazy fast! I didn't do as much sewing as I would have liked, but hopefully this will change in 2011! I'm planning on buying a dress form sometime in January, and stocking up on muslin so I can test the fit of things before I make it properly. Hopefully this will mean I actually wear the things I make :) Also, I'm going to try and not buy cheap bad quality fabrics, as this is also something I don't like about the things I've made so far. I hope this will also lead to more photo's of garments on my blog! (as in, I won't be too embarrassed to show them)
I do have to take a few photos of the jewellery I made over Christmas too! I got more supplies from my mum for Christmas, so I'm excited to show you the things I've made, and excited to make more!
I hope you all enjoy your New Years celebrations! Dom has a cold so I don't think we'll be doing much. Ah well :)
Jellybean x
Monday 20 December 2010
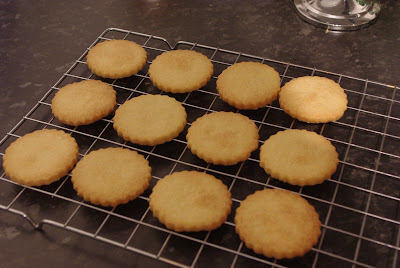
Short bread biscuits
I made shortbread biscuits last night, and they were so good we've already eaten them all!
Ingredients
125g/4oz butter
55g/2oz caster sugar
180g/6oz plain flour
1) Beat the sugar and butter together until pale.
2) Stir in the flour to get a smooth paste (I had to add a little water to get it to stick together well)
3)Turn onto a floured surface and gently roll out until 1cm thick.
4) Cut into rounds using a biscuit cutter. Put on the baking tray and refrigerate for 20 minutes.
5) Bake for 15-20 minutes (I found that 10 minutes was ok) in an oven preheated to 190'C/375'F/Gas mark 5 until golden brown. Leave to cool.
We ended up with about 24 biscuits. The dough was really nice to work with :) and the biscuits had a lovely crumbly texture. Here's how they turned out:
 Jellybean x
Ingredients
125g/4oz butter
55g/2oz caster sugar
180g/6oz plain flour
1) Beat the sugar and butter together until pale.
2) Stir in the flour to get a smooth paste (I had to add a little water to get it to stick together well)
3)Turn onto a floured surface and gently roll out until 1cm thick.
4) Cut into rounds using a biscuit cutter. Put on the baking tray and refrigerate for 20 minutes.
5) Bake for 15-20 minutes (I found that 10 minutes was ok) in an oven preheated to 190'C/375'F/Gas mark 5 until golden brown. Leave to cool.
We ended up with about 24 biscuits. The dough was really nice to work with :) and the biscuits had a lovely crumbly texture. Here's how they turned out:

Sunday 19 December 2010
Ramble ramble
Since starting this blog I haven't done as many projects as I'd like. This is mostly because money was tight (I blame student finance! grr), and when it was finally sorted it was the end of November. And then of course there was Christmas presents to buy. So I have to wait till after Christmas before I can start buying fabric again.
And even then it isn't going to be for me! Not that I mind, as it's for my little sister Ebony's birthday :) I'm ordering the fabric to make her a Princess dress! Remember when I bought these patterns?

After Christmas, it'll finally be time to make it! I can't wait! I'm going to order the fabric from Fabricland, and get some muslin too as its to cheap! I'm thinking satin, as its to soft and smooth and princessy! I'm looking forward to picking out the different lace and ribbon! I'm thinking the pink one in the picture, with the criss cross ribbon on the bodice, and trimming the sleeves in lace of some kind. I was going to go for marabou like on the white one, but they've just got a kitten who is a crazy little thing, who chases your ankles if you walk past him.
So I'm thinking anything too fluffy would be a bad idea. It will get attacked and Ebony will be sad. And a sad Ebony makes me sad. I'm sure I'll find something just as good.
Of course there will be pictures of the work in progress as I make progress. Her birthday is on the 18th of January, so it will be done by then. Or it had better be! I'll be taking it slowly, as I have three essays in for January too! And of course I'll update my measurements of her when I go home for Christmas.
And after that? Well, I guess I finally get to work on something for me! I haven't decided what yet, I've had a vintage pattern for ages now that needs grading down which I'm very tempted by. Or there's a reprint of a vintage pattern, but it needs an FBA which I'm finding difficult as it has gathers instead of darts. I also want to buy a pattern from Colette Patterns, which is Ceylon. I love this dress! I need it! It has gathers again, but I think Colette make their patterns for a C cup, so it may not be so bad.
Anyway, I'll stop rambling now :)
Jellybean x
And even then it isn't going to be for me! Not that I mind, as it's for my little sister Ebony's birthday :) I'm ordering the fabric to make her a Princess dress! Remember when I bought these patterns?

After Christmas, it'll finally be time to make it! I can't wait! I'm going to order the fabric from Fabricland, and get some muslin too as its to cheap! I'm thinking satin, as its to soft and smooth and princessy! I'm looking forward to picking out the different lace and ribbon! I'm thinking the pink one in the picture, with the criss cross ribbon on the bodice, and trimming the sleeves in lace of some kind. I was going to go for marabou like on the white one, but they've just got a kitten who is a crazy little thing, who chases your ankles if you walk past him.
 |
| He's called Crunchie. Isn't he cute?! |
Of course there will be pictures of the work in progress as I make progress. Her birthday is on the 18th of January, so it will be done by then. Or it had better be! I'll be taking it slowly, as I have three essays in for January too! And of course I'll update my measurements of her when I go home for Christmas.
And after that? Well, I guess I finally get to work on something for me! I haven't decided what yet, I've had a vintage pattern for ages now that needs grading down which I'm very tempted by. Or there's a reprint of a vintage pattern, but it needs an FBA which I'm finding difficult as it has gathers instead of darts. I also want to buy a pattern from Colette Patterns, which is Ceylon. I love this dress! I need it! It has gathers again, but I think Colette make their patterns for a C cup, so it may not be so bad.
Anyway, I'll stop rambling now :)
Jellybean x
I'm learning to crochet!
Dom also got me a crochet kit :) I have to crochet 9 crochet squares (YouTube seems to call them granny squares), then join them together and attach it to the front of cushion.
Here's my first one:
 It's so nice to do, though it does make my arm ache! I've wanted to learn since I was very little, since watching my Nanny Olive crochet what I seem to remember as a doily. I also remember a blanket made up of these crochet squares. You wouldn't believe my surprise when I recognised what I was meant to be crocheting :) I had to YouTube it before I realised what the instructions in my kit were telling me to do. I have a hard time visualising written instructions sometimes.
I'm onto my third square now, I'll post pictures of the finished cushion when its done :)
Jellybean x
Here's my first one:

I'm onto my third square now, I'll post pictures of the finished cushion when its done :)
Jellybean x
My First Necklace
I made my first necklace a while ago, and have only just got round to taking pictures! I made it with a kit that Dom got me for Christmas. Yep, we've already given each other our Christmas presents! :)
So here it is (excuse the bad focus, I couldn't get the camera to auto focus, Dom has probably been messing with settings. That or he's done it to make me learn to focus the damn thing properly!)
I'm very happy with it and have worn it a few times already. It's a slight shock to the system when I first put it on, as the beads are so cold! I enjoyed making it too, threading beads it so relaxing.
The kit and the beads are from The Bead Gallery, to be found in Lincoln, down a side street on Main Street. They also have a website so take a look!
For a closer look at the pictures, click em. They pop up in a nice light box thingy that Dom taught me to do :)
Jellybean x
So here it is (excuse the bad focus, I couldn't get the camera to auto focus, Dom has probably been messing with settings. That or he's done it to make me learn to focus the damn thing properly!)
 | |
| Red! I must make a red dress too :) |
 |
| Close up of the lovely heart pendant. |
 |
| Half blurry close up of the clasp. See my slightly wonky crimp beads? |
The kit and the beads are from The Bead Gallery, to be found in Lincoln, down a side street on Main Street. They also have a website so take a look!
For a closer look at the pictures, click em. They pop up in a nice light box thingy that Dom taught me to do :)
Jellybean x
Tuesday 30 November 2010
Behold! The finished Jayne hat!

Hurray! It's finished! :) Pretty cunning don'tcha think?
Jellybean x
Saturday 27 November 2010
The Jayne Hat proto-type
Anyone who is a fan of Firefly will know what the Jayne hat is! :D I love Firefly, if you haven't seen it, I highly recommend it! Dom and I started watching it (again!) the other day, and Dom decided he wanted a Jayne hat. So we started looking online for a pattern, and found this!
I ordered the needles, and decided to buy some cheap yarn to do a practice with as it was my first time using circular needles. I love them, they're so relaxing to use as you don't have to swap the needles in your hands, you just knit, knit, knit. So here's my proto-type:


I ordered the needles, and decided to buy some cheap yarn to do a practice with as it was my first time using circular needles. I love them, they're so relaxing to use as you don't have to swap the needles in your hands, you just knit, knit, knit. So here's my proto-type:

I didn't bother adding a pompom. I ordered my Lopi wool, and it came the other day. It's lovely stuff, so nice to knit with :) Here's a sneak peak:

I think the colours are perfect and I'm finding it goes really fast! I think I may have to knit a hat and scarf each for my brothers and sisters for Christmas!
Jellybean x
Saturday 30 October 2010
Five minute eggless mug cake
Last night I had a craving for something sweet (as usual! lol). Unfortunately we didn't have any eggs :( Dom suggested the five minute mug cake, but I said no, as I remembered it having an egg in it. However a quick search on google brought up this. I used the first recipe. However, the abbreviations for tablespoons and teaspoons are a wrong on a couple of the ingredients, so it was a bit hit and miss. So here's my slightly altered version, with no abbreviations :)
Ingredients
5 tablespoons all purpose flour
2 rounded tablespoons unsweetened cocoa powder
2 rounded tablespoons sugar
1/2 teaspoon baking powder (the original says 1/4 baking soda, but we didn't have any)
1/8 teaspoon salt
3 tablespoons milk
1 tablespoon oil
1/4 teaspoon vanilla essence
Put all dry ingredients in a small mixing bowl (or straight into your mug, but I find it easier to mix in a bowl). Give it a good mix. Add wet ingredients, and give it another good mix. Put the mixture into your mug. Then microwave it on full power for 2 minutes. Easey peasey! :)
I also put a nice big dollop of Fluff on top and it was delicious! Also, I forgot baking powder in the first one, it went more like a brownie than cake, so feel free to leave out baking powder too if you don't have any, as it's still yummy without it :)
Hope you enjoy it!
Jellybean x
Wednesday 13 October 2010
Lady Cherry's Blog giveaway!
Lady Cherry from Baking, Making and Creating is having a giveaway! The post is here. Goodluck!
Jellybean x
Jellybean x
Saturday 9 October 2010
My duct tape dummy : How to
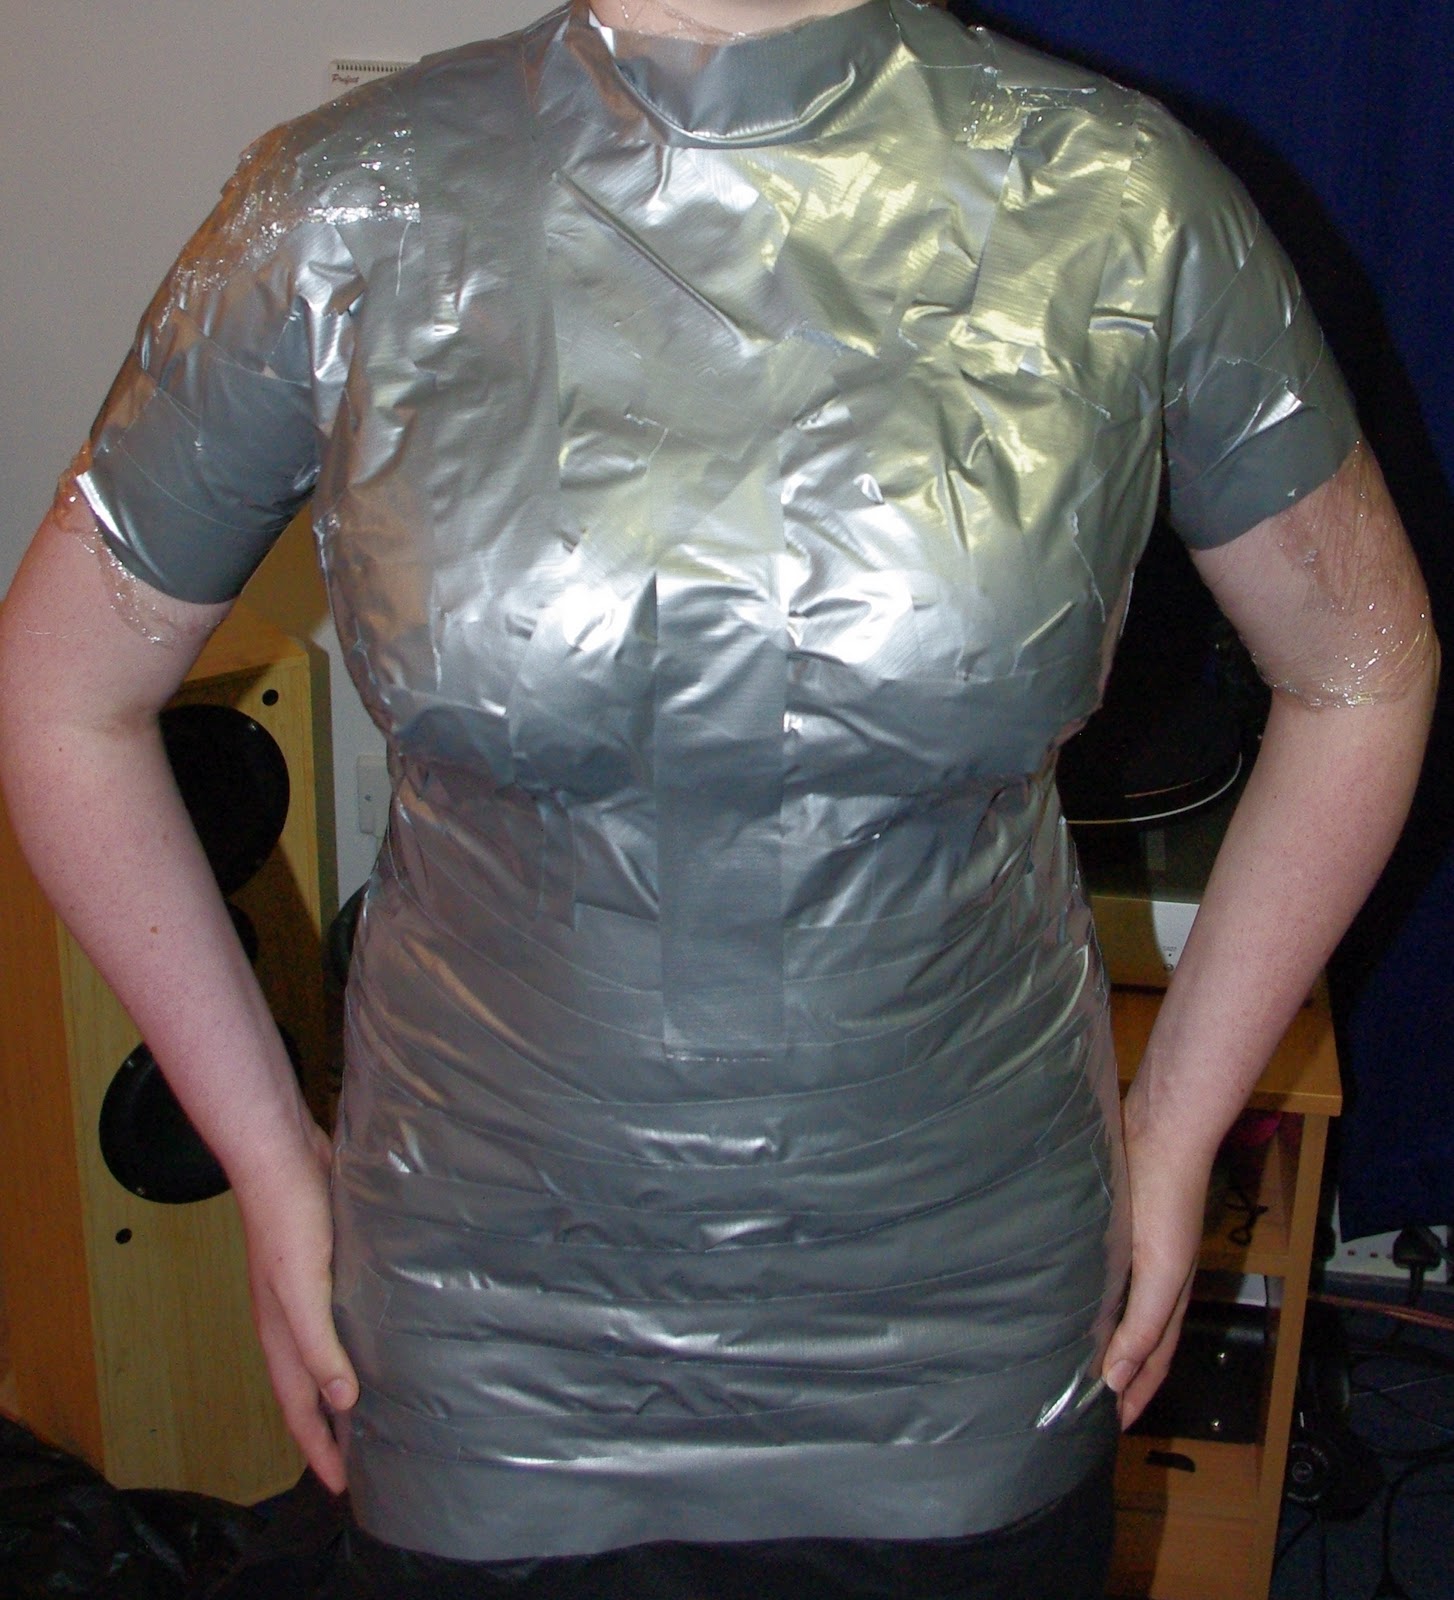
I made a duct tape dummy! I used about 3 rolls each with 50m on it, and I'm about a UK size 14. I used a bin bag to stick the tape to, as I've read in a few places that t-shirts can ride up because they're stretchy. I used cling film/wrap to do the top of my arms, and a little bit higher up my neck. I also made a cover from a large men's shirt. I got Dom to wrap me. Make sure you stand nice and straight! If you slouch, your dummy will slouch too. Open the windows, and if you have air-con, use it! You WILL get very hot. Why do you think I cropped my head off the photo's? I look awful because I'm so hot and sweaty! Make sure you wrap nice and tight, or your dummy will be too big.
Here's the pictures with a step-by-step explanation (go easy on me, this is my first attempt at a tutorial! If you have any questions, leave me a comment).
How to make your duct tape dummy
1) Shape the bust. To do this you need to start with a piece around your body just under the bust. Then with another piece, go between your breasts and over diagonally and over the shoulder. This piece should meet the piece that's around your body. A picture is probably the best way to explain:
 2) Next you need to shape your shoulder blades! Do this with a piece of tape going from your shoulder diagonally across your back to meet the piece around your body.
 3) Depending on how long you want your dummy to be, now would be the time to add some length if you want it. I cut up another bin bag and taped it around the bottom edge of the one I was already wearing. Sorry forgot to take a picture of this!
4) Next comes the bust. To do this you need to use smaller pieces of tape, depending on how big your bust is. I used about 5-6" pieces. Put one end of the tape over the middle of your breast and smooth it down outwards. You want to be making a star shape with the middle of the star in the middle of your breast. Repeat for the other side. When you've done both, add a piece down the centre of your breasts :) I hope you can see clearly on the picture (click it to make it bigger!)
 5) Now you need to do your tummy! For this bit I recommend using pieces about 9-12" long. Overlap the tape by about half an inch. See the above picture for the front view :)
 6) Next up is the top of your torso. For this bit, I put the tape on horizontally, Then added pieces that went over my shoulder like straps. See the next picture for this.
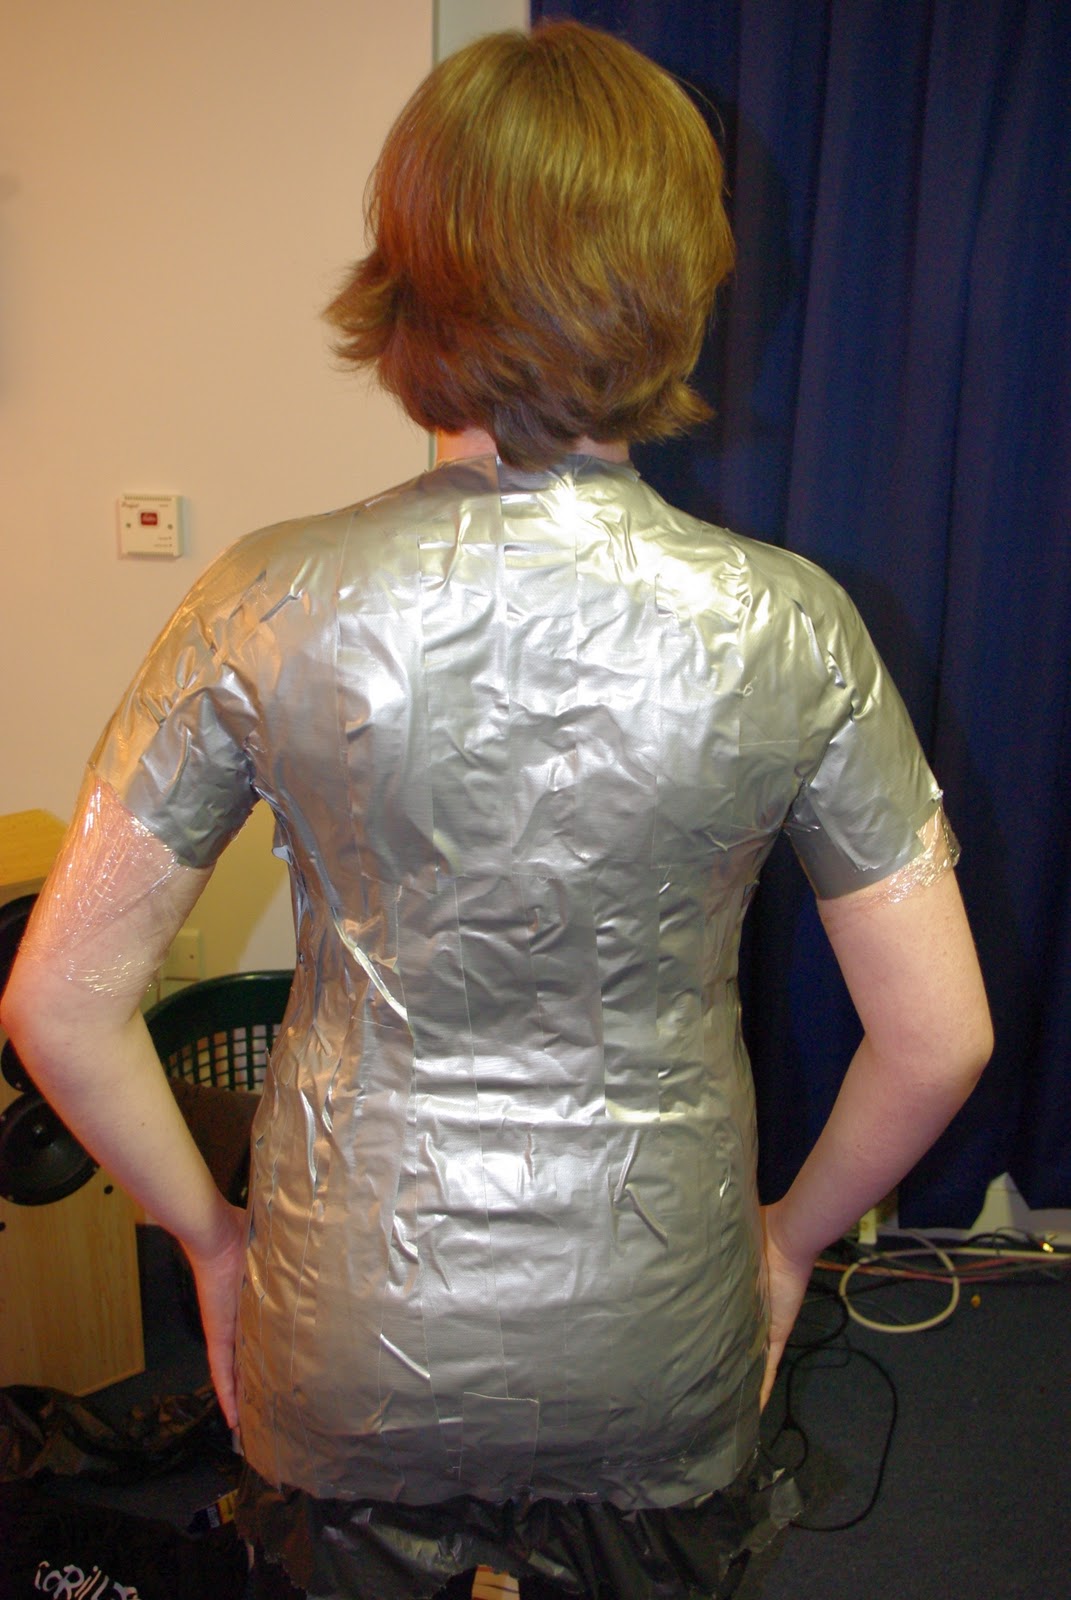
7) If you want to add length to the arms and up your neck, you'd better do it now! Use cling film to do this. Wrap it around the top of your arms pretty tight, but not so tight that your arm bulges out the end. Try to get it to overlap the tape on your shoulders, as this will make taping it onto the rest easier. Tape around the edges, then wrap all the way around your arm till you reach the desired length.
There is no easy way to do the neck. Use the same method as you did for your arms. Take your time, don't rush or you'll mess up. It won't be pretty, but the layers will sort this :)
 And the back view:
 8) Now that you've got the basic shape, you need to reinforce it so it'll keep its shape when stuffed. To do this add a layer of duct tape that goes vertically. Use pieces about 6-9" long.
 And the back view:
 9) You're almost done! To make it even stronger, add another layer of duct tape, this time horizontally. Now you need to mark your dummy. Any permanent marker will do. Mark you waist, bust, centre back, centre front etc.
 And the back view:
 10) Get out! I (Dom) cut in a zig-zag up the back. This made it easier to match up when taping back together. I also had to cut up the arms and shoulder to get my arms out without distorting it too much.
11) Tape up the back, reinforce it lots so it'll be able to stand stuffing. And of course if you had to cut the arms to get out, tape those up too.
12) Before going any further, measure your dummy. Check the measurements match your own. I forgot to this until I had stuffed up to the armpits! I had to unstuff to make it right!
So, if the measurements are significantly bigger than your own, you'll need to perform surgery on your dummy.
13)However, if you've done an excellent job and the dummy's measurements match your own, you can go ahead and stuff it. But first you need to give it a base. I used cardboard. Draw round the bottom of your dummy onto the cardboard, cut it out, insert into the bottom of your dummy and tape in place. Tape up the armholes. You can use practically anything to stuff it with. I used newspaper, leaflets, magazines, one of Dom's old shirts, all sorts. Be careful not to distort the shape, mine ended up with a funny pointy outy tummy, so I had to squeeze it back into shape.When your done stuffing, tape up the neck hole.
How to perform lipo-suction on your dummy
2) OK, now you need to draw a cutting line down the side of your dummy. Once you've done this, measure your specified amount away from this. In my example: at the waist I measured 1.5" away from my cutting line because this is how much I wanted to reduce it by. Do this for the hips and bust, and draw a line to connect them.
3) Cut up your cutting line. On the picture below, you can see where I've cut up my cutting line, and also where I've measured away from this at the waist and hips. (Remember you can click on a picture to make it bigger).
 4) Here comes the lipo-suction! Take a small piece of duct tape, an inch or so long. Attach it to the flap that's on the left on the picture above, with half of the tape overhanging. With your hand on the inside supporting your dummy, pull it across until it matches your other line, where you measured. Press the tape down firmly. On the picture below you can see where I've taped the flap down matching the line I measured.
 5) Do the same all up the sides until its completely taped up. Repeat on the other side. Reinforce the join thoroughly, or it'll pop open when stuffing. It'll look a little wrinkled and battered from being pulled and tugged, but don't worry it'll disappear when stuffed.
 And the back view:
 6) Re-measure just to make sure :) I also cut the arms shorter, as I found it difficult to get garments onto the dummy when they were longer.
7)Stuff! See above for how :)
Next I made a cover for my dummy. I decided to do this because I wanted a nicer finish, and also something to pin to so my pins didn't get sticky.
How to make a cover for your duct tape dummy
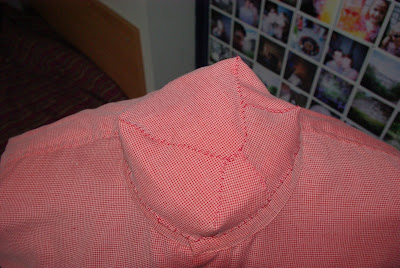
1) Get a men's shirt that is too big for you. Men's shirts are better than women's for this because they have relatively no shaping or darts. I got mine from a charity shop for a couple of pounds.
2) Cut the collar off. Cut the sleeves off. Cut up the side seams. Leave the shoulders intact.
3) Put the shirt on your dummy and button it up. I put it on right side out, so that when it was done, the buttons would be on the inside.
4) Pin the side seams back together, following your shape. Try to do it equally, so that the buttons follow the centre front line you drew.
5) Now you'll need to pin in some darts. To do this see where the fabric wants to naturally make a fold, where the excess naturally sits. Pin this to make a dart. Try to do this equally on both sides, repeat until you have no excess fabric.
 And the back view:
 6) You'll need to sew the darts first. To do this unpin the sides. Don't worry, once the darts are sewn, they'll be easy to pin again. Follow the pins until all the darts you pinned are sewn.
7) Put the shirt back onto your dummy again. re-pin the side seams. Sew them.
8) To put the sleeves in you'll need to cut up the seam on the sleeve. Pin into place. The sleeve will probably be too big for your armhole, don't worry, just let the edges overlap. Sew in place.
9) Once you've sewn both sleeves back in place, trim them to about 3 or 4". Put the shirt back on your dummy. Fold the sleeve neatly to hide all raw edges and to leave a nice neat arm. Pin in place as you go. Hand stitch in place. I was too impatient to slip stitch it, but it looks OK :)
 10) Next you'll want to do the neck. To do this, I used what was left of one of the sleeves. Pin it on around the edges of the collar bit. Fold under raw edges as you go. Again, it'll probably be to big for the hole, but let it overlap.
11) Use the same technique as you did for the armholes. Fold and pin until its neatly in place, with no raw edges showing. Sew in place in the same as the armholes.
 12) You're done! Congratulations on making your very own duct tape dummy, complete with cover!


I hope you found this helpful and enjoyable! And please link me to pictures of your own dummies, I'd love to see them!
Jellybean x
Here's the pictures with a step-by-step explanation (go easy on me, this is my first attempt at a tutorial! If you have any questions, leave me a comment).
How to make your duct tape dummy
1) Shape the bust. To do this you need to start with a piece around your body just under the bust. Then with another piece, go between your breasts and over diagonally and over the shoulder. This piece should meet the piece that's around your body. A picture is probably the best way to explain:


4) Next comes the bust. To do this you need to use smaller pieces of tape, depending on how big your bust is. I used about 5-6" pieces. Put one end of the tape over the middle of your breast and smooth it down outwards. You want to be making a star shape with the middle of the star in the middle of your breast. Repeat for the other side. When you've done both, add a piece down the centre of your breasts :) I hope you can see clearly on the picture (click it to make it bigger!)


7) If you want to add length to the arms and up your neck, you'd better do it now! Use cling film to do this. Wrap it around the top of your arms pretty tight, but not so tight that your arm bulges out the end. Try to get it to overlap the tape on your shoulders, as this will make taping it onto the rest easier. Tape around the edges, then wrap all the way around your arm till you reach the desired length.
There is no easy way to do the neck. Use the same method as you did for your arms. Take your time, don't rush or you'll mess up. It won't be pretty, but the layers will sort this :)


11) Tape up the back, reinforce it lots so it'll be able to stand stuffing. And of course if you had to cut the arms to get out, tape those up too.
12) Before going any further, measure your dummy. Check the measurements match your own. I forgot to this until I had stuffed up to the armpits! I had to unstuff to make it right!
So, if the measurements are significantly bigger than your own, you'll need to perform surgery on your dummy.
13)However, if you've done an excellent job and the dummy's measurements match your own, you can go ahead and stuff it. But first you need to give it a base. I used cardboard. Draw round the bottom of your dummy onto the cardboard, cut it out, insert into the bottom of your dummy and tape in place. Tape up the armholes. You can use practically anything to stuff it with. I used newspaper, leaflets, magazines, one of Dom's old shirts, all sorts. Be careful not to distort the shape, mine ended up with a funny pointy outy tummy, so I had to squeeze it back into shape.When your done stuffing, tape up the neck hole.
How to perform lipo-suction on your dummy
2) OK, now you need to draw a cutting line down the side of your dummy. Once you've done this, measure your specified amount away from this. In my example: at the waist I measured 1.5" away from my cutting line because this is how much I wanted to reduce it by. Do this for the hips and bust, and draw a line to connect them.
3) Cut up your cutting line. On the picture below, you can see where I've cut up my cutting line, and also where I've measured away from this at the waist and hips. (Remember you can click on a picture to make it bigger).


7)Stuff! See above for how :)
Next I made a cover for my dummy. I decided to do this because I wanted a nicer finish, and also something to pin to so my pins didn't get sticky.
How to make a cover for your duct tape dummy
1) Get a men's shirt that is too big for you. Men's shirts are better than women's for this because they have relatively no shaping or darts. I got mine from a charity shop for a couple of pounds.
2) Cut the collar off. Cut the sleeves off. Cut up the side seams. Leave the shoulders intact.
3) Put the shirt on your dummy and button it up. I put it on right side out, so that when it was done, the buttons would be on the inside.
4) Pin the side seams back together, following your shape. Try to do it equally, so that the buttons follow the centre front line you drew.
5) Now you'll need to pin in some darts. To do this see where the fabric wants to naturally make a fold, where the excess naturally sits. Pin this to make a dart. Try to do this equally on both sides, repeat until you have no excess fabric.


7) Put the shirt back onto your dummy again. re-pin the side seams. Sew them.
8) To put the sleeves in you'll need to cut up the seam on the sleeve. Pin into place. The sleeve will probably be too big for your armhole, don't worry, just let the edges overlap. Sew in place.
9) Once you've sewn both sleeves back in place, trim them to about 3 or 4". Put the shirt back on your dummy. Fold the sleeve neatly to hide all raw edges and to leave a nice neat arm. Pin in place as you go. Hand stitch in place. I was too impatient to slip stitch it, but it looks OK :)

11) Use the same technique as you did for the armholes. Fold and pin until its neatly in place, with no raw edges showing. Sew in place in the same as the armholes.


And the back view:

I hope you found this helpful and enjoyable! And please link me to pictures of your own dummies, I'd love to see them!
Jellybean x
Wednesday 29 September 2010
Halloween Costume
Jellybean x
Monday 27 September 2010
Knitted socks
Yay, I finally finished my socks! Here they are:

 I've just started a pair for Dom :)
Jellybean x


Jellybean x
Sunday 12 September 2010
The finished backpack!
I finished India's backpack today! Here are some pictures:


I think she's gonna love it! :) It took a bit of careful thinking to get the lining and outside sewn to the top zip piece without showing any seams, but I got there in the end :D Its made from interfaced linen to keep it stiff, and the lining and side pocket is gingham. And yes those are packing peanuts in there, India asked for some in about May, so I've been collecting them from packages and parcels since then! :)
Jellybean x
Friday 10 September 2010
Buttons and bows

My vintage pattern came on Tuesday! I haven't had a chance to play around with it properly yet, but I love it already.
Dom also bought me a Venus fly trap yesterday! :D It's an amzing little thing. Here's a photo :

On this photo you can see the trap that I fed a spider to! Its started oozing goo, which is a good sign, as it means its started to digest the spider :D
Jellybean x
Sunday 5 September 2010
New pattern!
I bought a new pattern today from ebay. Its my first vintage pattern, and I can't wait till it gets here!
I still haven't got round to taking a picture of my jacket, and my dress still needs straps, but I'll get round to it eventually :)
Jellybean x
I still haven't got round to taking a picture of my jacket, and my dress still needs straps, but I'll get round to it eventually :)
Jellybean x
Sunday 29 August 2010
Socks
I finished my jacket last Friday! Then I went home for a week, so I haven't had a chance to take a photo yet. I might take one later if I remember.
I also need to take a photo of the dress that I made my own pattern for. Its still needs to be put in the wash, I keep forgetting to put it in. At the moment its still covered in fabric pen markings.
I have also bought a set of double pointed needles, along with some wool and a pattern to make socks! :D I did a practice one last night, and I think I know what I'm doing :S I only got as far as I did thanks to this youtube video. The video is the first of four, and the lady Dorret goes through the steps of making a sock in a very well explained way, and she helped me make sense of the instructions on my pattern :) Hope my socks go well!
Jellybean x
Sunday 15 August 2010
Bread and my new jacket pattern

My dress is going well, it fits perfectly. I just need to add straps, and wash it so I can iron all the pleats nicely. There's also lots of marking on it in a water soluble bright blue fabric marker, so it certainly needs a wash, I can't be bothered to sponge off all those markings!
I also have a new jacket pattern! It's this one. I think I'll make the one on the top left, but with the sleeves from the top right. I haven't made a jacket before, so I've been reading the instructions through lots to make sure I understand them. I've got as far as ironing the pattern pieces. Then I'll trace the pattern using baking parchment (its cheaper than proper pattern paper). Then comes the altering to fit! I haven't done this before either, so I hope it goes well :)
Jellybean x
Tuesday 10 August 2010
Phew. . .
Kneading bread dough is hard work! I haven't made bread before, so I hope it goes ok :) the dough is currently on the warming plate on the top of our coffee maker, I'm hoping the warmth will make it rise well.
Update on that dress: I sort of gave up. The bodice was just too big, and I couldn't be bothered with altering it. The skirt bit was still ok though, so I've decided I'm going to make my own bodice part for it. I think I'm going to try a 50s style pin-up dress. I'm sure I can salvage that much from the left over material. . .I hope.
Jellybean x
Sunday 8 August 2010
Finally!
Yay, finally cut out the lining for a dress that I started ages ago :) I think I'll start sewing it tomorrow :)
Jellybean x
Jellybean x
India's Backpack
My little sister has been asking me to make her a backpack for ages. Her birthday is coming up, so I thought it'd be a good idea to get it made for her birthday.
Today, I finally finished the practice version. It's made from odds and ends of fabric that I had, so it doesn't match, the thread doesn't match, the fabric wasn't ironed, I didn't trim seam allowances or do anything to make it nice and neat, I just wanted a quick practice.
 As it turned out, it wasn't quick as I managed to lose my little bag full of thread, and so couldn't sew a stich for a day or two. I finally found my thread, and finished the practice backpack.
I decided on a pocket on each side (though you can't really tell on the photo), there's a small pocket on the inside, and a button fastening. I gathered the top edge of the fabric so it tapers in at the top. I haven't decided whether I will do this in the actual backpack, or whether I will just cut the pieces out tapered. I also made the straps myself by folding a piece of fabric, and doing lines of stitching in rows, end to end. The inside is also lined. The whole thing needs to be neater, but at least I have some good experience now :)
Today, I finally finished the practice version. It's made from odds and ends of fabric that I had, so it doesn't match, the thread doesn't match, the fabric wasn't ironed, I didn't trim seam allowances or do anything to make it nice and neat, I just wanted a quick practice.
 As it turned out, it wasn't quick as I managed to lose my little bag full of thread, and so couldn't sew a stich for a day or two. I finally found my thread, and finished the practice backpack.
 I decided on a pocket on each side (though you can't really tell on the photo), there's a small pocket on the inside, and a button fastening. I gathered the top edge of the fabric so it tapers in at the top. I haven't decided whether I will do this in the actual backpack, or whether I will just cut the pieces out tapered. I also made the straps myself by folding a piece of fabric, and doing lines of stitching in rows, end to end. The inside is also lined. The whole thing needs to be neater, but at least I have some good experience now :)
Buttercup bag
 |
| Lovely sequins, and my rainbow tag :) |
 |
| The lovely lining, and the pocket. |
I made this using a free pattern, which can be found here.
Jellybean x
So I have a blog. . .
This is my first blog. Yay! So as its my first, I've basically no idea what I'm doing, so bare with me while I learn (or get my fiance to show me how, he is studying computer science!).
I'll be including a little bit of everything, from sewing projects or what I've baked to how my chilli plant is doing (very well actually, I haven't managed to kill it yet).
So I'll try my best :)
I'll be including a little bit of everything, from sewing projects or what I've baked to how my chilli plant is doing (very well actually, I haven't managed to kill it yet).
So I'll try my best :)
Subscribe to:
Posts (Atom)