Monday 31 January 2011

I did a silly thing.

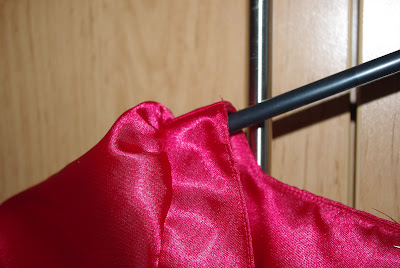
I let my heart choose the fabric for B5032 instead of using my head. I loved the colour, and ignored the fact that it was quite a heavy twill type fabric. The fact that its so thick makes the darts sit funny. I've tried making them shorter, longer and have ironed the heck out of them. I've come to the conclusion that the fabric is just too thick and heavy. Or at least I think that's what it is, I'll take some photo's tomorrow and post them. I've had way too hectic a day to be bothered to do it tonight. I'll also take photo's of the muslin too :)
That has made a crappy tiring day even more crappy. I'm annoyed at myself. My only consolation is that I might be able to salvage the skirt. But no promises. I think I've had enough of this pattern for now, and will get more fabric to make it another time. In the mean time, I'll try out the muslins for the Colette patterns so I can sew those up when the fabric gets here. I should have more success with those fabrics as they were in the dress making section, not the super-heavy-I-will-ruin-your-darts section (I actually bought this fabric from the market, so I even got to feel the weight and drapeyness of it, and still thought it was a good idea!)
Back tomorrow with photo's of those stupid darts.
Jellybean x

Saturday 29 January 2011

My first fabric splurge!

Ooh it feels good! :D I ordered fabrics to make 2 Beignet skirts and 2 Sencha blouses. Here's what I ordered:
Shell fabric for Beignet
Navy Klona Cotton
To be lined with
Royal blue Polycotton lining
I plan on wearing this with a Sencha blouse made from this:
Scarlet silk crepe
This colour combination is very daring for me! Hopefully I can pull it off :)
The second Beignet is to be made from:
Crimson Klona Cotton
Can you tell I like red? :) To be lined with
Pink polycotton lining
I plan on wearing this with a Sencha blouse made from this:
Black silk crepe
So what do you think? Am I crazy? Will these colour combinations work together?
I'm looking forward to the luxury of real silk! I like planning an outfit and then buying the fabrics for it. I think this is probably how I will always buy fabric, it means I never buy too much or too little, and will keep my fabric buying at a reasonable level. I don't plan on buying any more fabric until these outfits are sewn up. For one, that splurge cost £70 which is more than enough for one day (week/month! lol) and for another, I just don't have the room for a stash. This should last me a while, as I have to muslin these patterns first, but the second outfit should be quicker as I'll have already sewn a muslin and the real garments! :)
So what was your most recent fabric purchase? And how do you buy fabric? Do you buy as you need it, or do you have a stash that you add to when you want it?
Jellybean x

Could it really be this easy?!

My patterns came today! So I can definitely recommend Sewbox as a UK supplier of the Colette patterns :)
As for the patterns themselves, wow! They're lovely, the instructions are in booklet form, with a sleeve in the back for the pattern pieces. Nice and sturdy :) I've glanced through the booklet, and the instructions are clear with extra help like a glossary!
After I finished looking through it, I looked at the size chart, and did a double take. My measurements are all in the same column!! Is this some kind of witchery?? This has NEVER happened to me before ever! This could mean that the only alteration I might need to make is to raise the waist! Easy peasy! I think I'm going to start with the blouse, as it takes less fabric to check if I need an FBA with these patterns. If I need one with the blouse, I assume I'll need one with the dress.Does sound like it makes sense?
I'm almost done with the muslin for the dress I'm working on too. I might start looking for fabric for the blouse :)
Jellybean x

Thursday 27 January 2011

Colette love

Ooh! I'm so excited, I've just ordered 3 of the lovely Colette Patterns!! I ordered them from Sewbox, as they'ew a UK supplier so they'll get here quicker :D So which ones did I order? The Sencha blouse, the Beignet skirt, and the Ceylon dress. I fell in love with all three when I first saw Tilly from Tilly and the Buttons versions :) I've wanted these patterns for ages! Though I have yet to work out how to d an FBA on the dress and blouse though :S I'm sure consulting Fit for real people will help :)
As for the fitting of the skirt, it was easy compared to the bodice! I had to move the pleating and darts so that they lined up with the darts on the bodice, and add a little to the side seam, but that was it! I'm planning on sewing the entire dress in muslin tomorrow to test it, and then I think I can go ahead with my fashion fabric! I picked out a poly cotton twill in a lovely red :) I'm going to pre-wash it later, as Im unsure how much is cotton so don't want it to shrink.
Oh, and I found my cami, so hopefully should be able to post pics when the next muslin is done!
Jellybean x

Sunday 23 January 2011

Troubles with darts

I messed around with the darts on the bodice for ages, before I realised they were too low! Being too low was making the ends pucker which I put down to my bad sewing, but as soon as I moved them up, they were fine and fit beautifully :) I had forgotten that the FBA lowered the darts. Next time, I'll remember and will try moving the darts up before messing with the length. This is a lesson to mark the apex of your bust properly! I had marked mine too low when I was tissue fitting without realising, and didn't think to try remarking it in fabric *sigh* I guess this will make sure I remember in the future. Sorry, still no pictures, can't find my white cami. 
Now to make the skirt fit my fat ass! lol
Oh, and I just realised that I haven't told you what pattern I'm using! It's a Butterick 'Retro' pattern, B5032. I chose this one as it had all the darts in the right place to do what looked like the simplest FBA in the Fit for real people book.And I liked the dress obviously :)
I still can't believe that it actually fits. It fits!! Did I mention it fits?? :D
Jellybean x

Friday 21 January 2011

My first attempt at fitting

So I've made my first muslin! No pictures for you though, as you can plainly see through the muslin and I'd rather you didn't see that! I'm going to keep a look out for a stretchy white camisole top so I can wear the muslin over it and show you pictures next time.
I used the tissue fit method in Fit for real people, and it worked great! Of course, I needed Dom's help to check the fit in the back, and measure bits. I went with a size 16, though in hindsight I should have gone for the 14 for the shoulder fit.
Before I started the tissue fitting, I added 3 inches to the waist. Then the tissue fitting began, starting with the back of course! I shortened the length by 2.25 inches, and took a 0.5cm vertical tuck out of the back. I thought I had a narrow back, but I could also have started with a size 14. This made the back piece sit 'flush against my back' to use Dom's words. Now that the back was sorted I had to do the FBA. I needed a 1.5" FBA. This wasn't as scary as I thought it would be :)
I sewed up the muslin and tried it on. In fabric the shoulders were waaay to wide, 2.75 inches too wide to be exact. Also the bust apex was too low in fabric. And it hit my waist with no seam allowance left.
So for my second muslin I need to:
-move the shoulders 2.75" in, tapering down to 1" in at the neckline (if that makes sense)
-adjust the darts to work with the new bust apex
-add 1.5cm to the length.

Shouldn't be too difficult :) I hope so, at least. All this adjusting has made me realise why my first dress fit so badly! How did your first fitting attempt go?
More soon :)
Jellybean x
ps. sorry that I switch from inches to centimetres, I can't seem to stick to one!
pps. Dom is adjusting the pressure on the coffee machine so it brews the perfect shot of espresso. Its making me nervous! What if he breaks it?!

Tuesday 18 January 2011

Progress Report #5: M5731 - Finished!

I finished it just in time to catch the 3.30 train home! She loves it, and it fits perfectly :)
Here are some pics of it during construction, and of course when its finished. I don't have any pics of Ebony wearing it yet, but hope to get some tomorrow.
Close up of the ribbon loops for the corsety bit, hand basted.
The main bodice
The main bodice, all nice and underlined. Seams are finished using mock french seams.
The main bodice, you can see that the underlining gave it more body than the lining.
I love the cute puffed sleeves!

The sleeve seam, I used bias binding to bind it so it doesn't itch or fray.
The skirt attached. The basic dress is done. But what's a princess dress without frill and trim?!
Ta-daaa!! So cute! :)
A close up.
The back.
The inside of the front.
The inside of the back.
That's a lot of pictures! I had meant to blog about it as I went along so you didn't have to look through loads of pictures at once, but I ended up not having time, I finished it only half an hour before we had to leave to catch the train!
I'm happy to say that this is the first garment that I am proud of (hence why this is the first garment that I have showed pics of! Though I'm going to try and post pics of the things I didn't do well on too). I took no short cuts, and feel like I actually constructed it, instead of just sewing bits of fabric together. It's shown me that I can do it, and that my sewing machine is perfectly adequate (though of course I still want another one! lol). I even did a waist stay! Though its hidden under the lining, I forgot to take pics of that.
This has also shown me how much I have learnt since I last made a garment. I'm a member of The Sewing Forum, and I've learnt so much from these wonderful, helpful, friendly, knowledgeable (. . .I could go on! They're all lovely) people, I just hope I can give a bit back one day :) And of course all you lovely bloggers, who are so generous with your experiences and tips and tutorials. Thank you to you all!
Tomorrow, I am going to start working on a new pattern that I bought specifically because it had darts in the right places for the simplest FBA in Fit for real people. Wish me luck! I'll try and post pics as I go along.
Jellybean x
ps. as always, you can click the pics for a closer look!

Tuesday 11 January 2011

Progress Report #4: M5731

As you can see, I've underlined the main bodice pieces! I decided to baste them on by hand as the satin is tricksy :) Look at the mess my fabric marker made of the front bodice piece! Its  good job its water soluble! This photo doesn't do justice to the colours, the dark red is gorgeous! I also put together the bodice lining.
That's pretty much as far as I got today. I've started adding the ribbon loops to the front bodice piece by hand, but it isn't finished yet. A lot of what I've done so far is hand sewing, as I had to hand-baste the mock french seams on the lining before I took it near the machine as the satin is so damn tricksy.
I'm enjoying taking this slow, and paying attention to notches, and taking the time to finish the inside properly :)
Hopefully, more tomorrow :)
Jellybean x

Homemade calzone

Now, I'd like to say that this photo doesn't show how delicious this is. So don't judge by the photo! Let your taste buds do the judging!

Ok, so for the dough:
Ingredients
250ml of warm water
half a tablespoon salt
1 tablespoon sugar
1 tablespoon olive oil
1 tablespoon fast action dried yeast
Approximately 400g plain flour

1) put warm water and yeast in a large bowl. Add sugar and let it sit for 5-10 minutes, until the yeast activates and foams. Add the salt and oil.
2)Gradually add in flour as stirring the mixture. (The original recipe said 240g of flour, but I found this to be way to little. Hence why I said approximately 400g. I keep adding flour until I feel like I want to touch it, until its not possible to stir it anymore).
3)Knead the dough for about 10 minutes. Keep sieving flour over it whenever it feels sticky. It should be super soft when you knead it, very elastic, and shouldn't rip when you stretch it.
4) Put it into a floured bowl, and let it rise for about an hour at room temperature, or 5 hours in the fridge.
5) place on a floured surface and knead it gently to knock the air out of it.
6) half the dough. Its plenty for two pizzas, or in this case two calzones :)

Now for the filling. I did this while the dough was rising.
Ingredients
2 tablespoons of olive oil (and oil for frying)
2 small red onions, chopped
1 aubergine,cubed
2-3 garlic cloves, chopped
50g (drained weight) sun-dried tomatoes in oil, chopped
1/2 teaspoon of dried thyme
125g mozzarella cheese, cubed
splash of red wine if you have it
salt and pepper to season

1) heat some oil in a pan. Add the red onions and fry until soft.
2) add the aubergine, garlic, sun-dried tomatoes, thyme, and seasoning.
3) cook for 4-5 minutes, until the aubergine is beginning to soften, stirring frequently.
4) I felt it was a bit dry, it needed a bit more moisture. I added a generous splash of red wine, and put it back on the heat until there wasn't any liquid at the bottom of the pan.

Ok, now back to the  pizza dough!
1) Once its halved, roll each half out to about 9-10 inches.
2)Divide the filling mixture between the two, spreading over one half of each pizza base. Add the mozzarella on top of the filling.
3)Dampen the edges of the pizza bases with water, and fold over the dough to cover the filling. Press around the edges to seal it. Like a pastie :)
4)Place the calzones onto a greased baking sheet.
5)Brush the calzones with half a tablespoon of olive oil each. Make a small hole in each calzone to let steam out.
6)Bake for 15-20 minutes until golden in an oven preheated to 220'C.
7)Remove from the oven, and brush with olive oil again. Serve!

Delicious! Though we each had to leave half as we were so full! Oh well, left overs for tea tomorrow night! :D Calzone is such a great idea as there are so many things you could try as a filling!
If you try it, I hope you enjoy it as much as we did :)
Jellybean x

Monday 10 January 2011

Yes!

Woohoo! I managed it! All of my essays are done and submitted :D phew! It's such a relief.
When everything was submitted we went into town so I could visit the haberdashery stall. I picked up some extra strong thread so the thread doesn't snap when I gather that huge skirt. I also picked up some gross grain ribbon to use a waist stay, as the skirt might make the bodice sag, and I obviously don't want that. I also picked up some satin bias binding to enclose the waist seam and armhole seams with. I don't want that waist seam with all that gathering to be itchy on Ebony's little tummy :) Oh and I picked up some decent hand sewing needles! I'm sick of cheapy ones that bend all the time.
I've also decided to do french seams and mock french seams on the curved seams, as the satin frays like crazy, and I don't have an overlocker. It'll also make the seams a bit stronger. Oh, and I've also decided to underline the bodice in muslin as an extra precaution against the skirt making it sag, and also to give it a bit more body. All of these things are new to me, so I'm going to take my time and do my best :)
Jellybean x

Sunday 9 January 2011

Progress Report #3: M5731, and some thankyou's

Ok, so remember how I said at the end of this post that my essays were going well? Well, on Friday evening I had finished my social psychology essay, and had started my developmental psychology essay. So I thought, great! I was happily cutting out the pieces of the main fabric for Ebony's dress, when I got a text from my friend Emma asking how my safeguarding children essay was going. I replied that I hadn't started it yet, but I would start on Monday. When she replied I went into panic mode. She called me crazy because the essay was in for Monday! I said NO! The handbook says its in for the 17th! She said no, it was changed to the 10th. I thought no, she's wrong, she has to be wrong! But she was oh so right, I checked the online page that we were to submit it to, and it said the 10th. I carried on cutting out the remaining pieces, raging inside that I hadn't checked the submit date properly. I decided not to do any work that night, as I was too annoyed with myself and just wasn't in the mood. Emma sent another text, saying that it was a good job she texted me when she did! It certainly was!
So I would like to thank Emma very muchly for saving my bacon (theoretically speaking obviously, I'm vegetarian! lol).
So, all sewing activity halted. I finished my developmental essay yesterday, and only have about 600 words left to do on my safeguarding essay. I'm lucky, as this essay is submitted electronically, so I have until midnight tomorrow to finish it.
 So, I'm feeling much more cheery, as I'm almost done! I also got 2 more followers today, which also cheered me up a lot, as it does every time I've gotten a new follower :) so I'd like to say thank you to my followers too for cheering me up! :) I've also spent the day eyeing up the 10 metres of muslin that came with my Fabricland order. I'm excited to start working on something for myself, especially to the fitting process since I got Fit for real people! :)
So yes, not as much progress as I'd've liked, and a stressful weekend. But the silver lining is I'll be done with essays a week earlier, and will have a week to work on Ebony's dress without interruptions! :)
Hope you had a better weekend than I did.
Jellybean x

Thursday 6 January 2011

Progress Report #2: M5731

 I finally got round to tracing that last piece! I've also done a practice of the bodice :) I wanted to practice the corset/lacing effect, and I'm glad I did. I couldn't get the cross of the ribbons to sit in the middle :( I also set in the sleeves, which was a pain, as the armholes didn't fit around the free arm on my machine. And when I tried to attach the lower sleeves it didn't match up! I got frustrated and took the easy way out. I cut a strip of fabric and simply gathered it onto the sleeve. The one on the left is only 14 inches long, and the one on the right is 25 inches long. I prefer the one on the right :) I'm not sure how long I'll make them yet, or if I'll but some lace to do it in like the pattern suggests.

 So as I said, I wasn't happy with the ribbon. Dom had a great idea, and suggested I sew little loops of ribbon into the seam, and use these to lace it up! I think it looks great! And much easier to get in the right place :)

And a close up.
One of the things I kept thinking was, these pieces are so small! I've only ever sewn for myself before, so its strange to be using such small pieces, and not being able to try it on as I go.
Also Fit for real people came! I spent yesterday reading through it, and thoroughly enjoyed it! It's very well explained, and I loved that it takes you through the alterations for people from start to finish :) I can't wait to try what I've learnt.
I ordered the fabric for Ebony's dress yesterday morning from Fabricland. I've never ordered by phone before, so was a little nervous. The bloke I spoke to was very friendly and put me right at ease. An hour after I placed my order I got a call from them asking me to confirm the colour of muslin I ordered, it was nice to know they don't just chuck any old thing in. They were a pleasure to deal with, and I love that they're a family run business too :) And the best thing? My fabric arrived this morning! The cuts are generous which is appreciated and it was all packaged well. I can't wait to get fitting with the muslin and Fit for real people! :)
The fabric for Ebony's dress is a lovely colour! The cherry colour is a bit more red than I was expecting, but I love it and it looks lovely with the pale pink :)
I might cut out the fabric later.
Jellybean x

Saturday 1 January 2011

Progress Report: M5731

I have traced off all but the back skirt piece, because its big and I can't be bothered to do it yet. I've also done all the alterations :) I added and inch and a half to the length, half an inch to the bust, and and inch and a half to the waist. Before I worked out how much I needed to add/take away, I added an extra inch to Ebony's measurements in the hope it'll fit her for longer. Fingers crossed it doesn't just make it too big.
I updated my measurements of both India and Ebony while I was home for Christmas, and I'm glad I did because they'd both grown quite a bit! And because I took both of their measurements, Ebony doesn't suspect a thing!
I'm going to order the fabric on Monday from Fabricland, along with muslin for me :) I'm excited to get started. I might do a test run in scraps to make sure my alterations fit together nicely while I wait for the fabric to be delivered. And I might do a practice short skirt, as I haven't gathered anything that long before.
Also, I'm on schedule with my first essay, I did 504/2000 words today! I plan on having it finished by Tuesday, and starting the next one on Wednesday. If I stay on schedule they'll be done by Sunday night ready to hand in on the Monday. Then on Monday I'll start the last one, ready for the next Monday. While doing these essays I'll also be working on the dress, so I'm gonna have to keep a tight schedule on the essays!
Jellybean x

LinkWithin

Related Posts Plugin for WordPress, Blogger...